Connect Your Website
Install CookieShift on your site in minutes—script tag, WordPress, Shopify, or React.
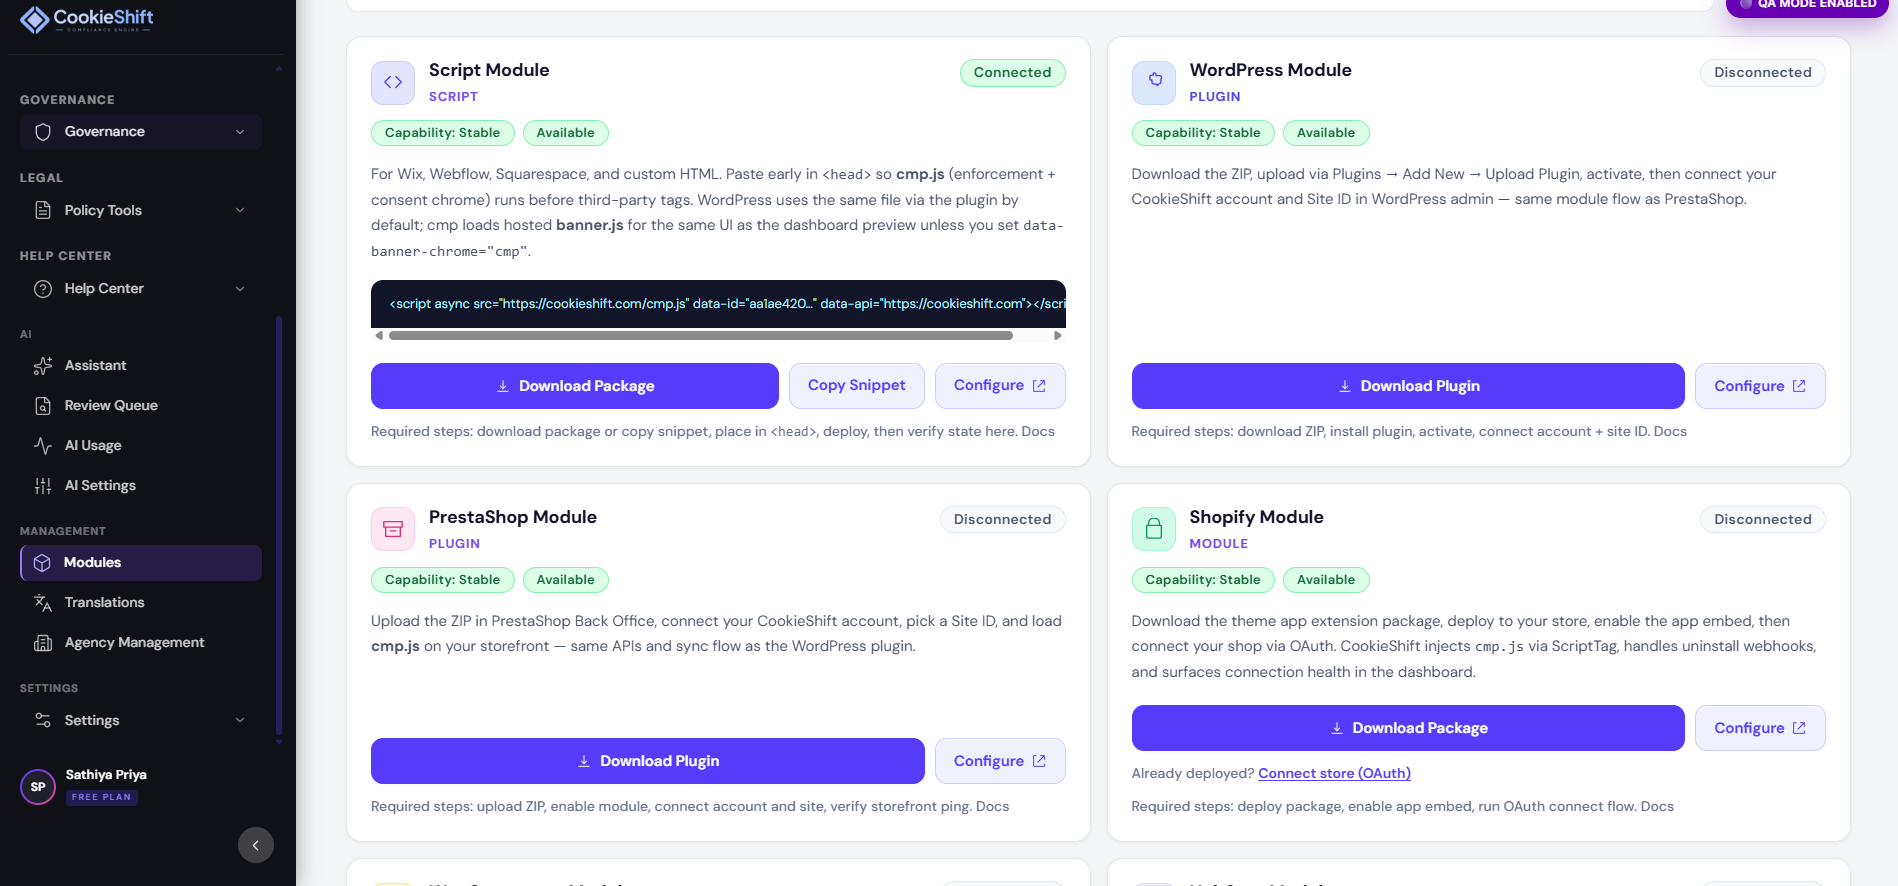
You do not need engineering tooling to use CookieShift—most teams connect a site from the dashboard in a few steps.
1. Create your property
- Sign in to the dashboard.
- Go to Websites → Add website.
- Enter the public domain visitors use (for example
www.yourbrand.com).
2. Add the CookieShift script
Open Modules with your property selected.
Any HTML site or CMS
Copy the script snippet and paste it into your site header (before </head>). Publish the template.
React / Next.js / SPA
Install the React SDK shown on Modules and render the consent component with your siteId.
WordPress
Install the official CookieShift plugin, then click Connect in wp-admin.
Shopify
Click Connect Shopify on Modules and approve the app for your store.
3. Verify connection
Return to Modules and check status:
- Connected — your site reached CookieShift successfully
- Installed / waiting — snippet present but no ping yet; clear cache and load the homepage
4. Publish your banner
Open Consent Setup, configure appearance and copy, and click Save.
Visit your site in a private window to confirm the banner appears.
5. Run a scan
Open Scanner → Run scan. When it completes, review Tracker Inventory and Compliance Issues.
6. Optional: invite your team
Share dashboard access according to your organization’s policy. Team invite UI may appear under Settings as it rolls out.
Need help?
- Getting Started — full onboarding checklist
- Troubleshooting — common fixes
- Help Center link inside the dashboard for support contact